
How to Use a Chile Roaster at Home: Step-by-Step Guide
Chile roasting is a time-honored culinary tradition celebrated in many cultures around the world. Whether you’re a fan of the smoky, spicy flavors of roasted peppers or simply looking to preserve an abundant chile harvest, a chile roaster is an invaluable tool to have.
Chile roasters are a great way to roast chiles at home. They are easy to use, efficient, and produce evenly roasted chiles. If you love to cook with chiles, a chile roaster is a must-have kitchen gadget.
In this article, I’ll explore the art of chile roasting and provide a step-by-step guide to help you achieve perfectly roasted chiles every time.
Gather Your Supplies
Before you start roasting chiles, it’s essential to gather all the necessary supplies:
- Fresh chiles: Select chiles that are ripe and free from blemishes. Popular choices include Anaheim, Hatch, Poblano, and Jalapeño chiles.
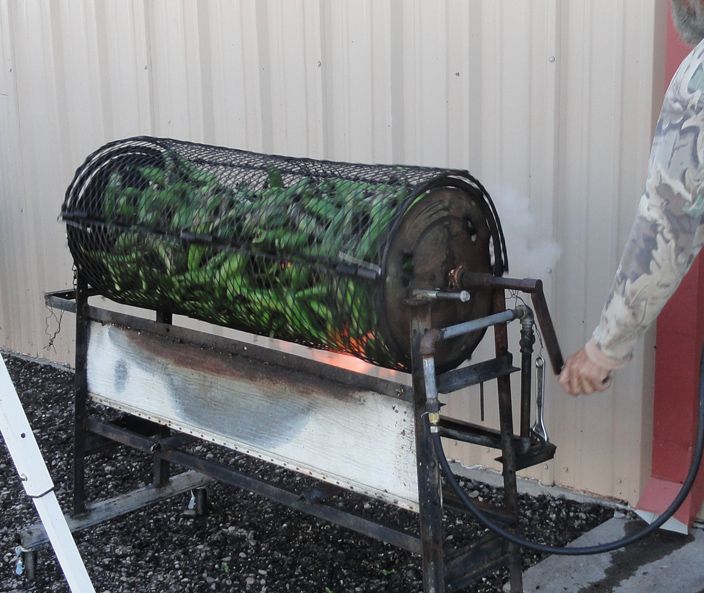
- Chile roaster: You can use a specialized chile roasting appliance or adapt your grill for this purpose.
- Tongs: Long-handled tongs will help you handle the chiles safely.
- Heat source: Whether you’re using a chile roaster or a grill, ensure you have a reliable heat source.
Prep Your Chiles
Wash the chiles thoroughly and pat them dry with a clean kitchen towel. Remove any stems, and you’re ready to begin.
Preheat Your Chile Roaster
If you have a chile roaster, follow the manufacturer’s instructions to preheat it. If you’re using a grill, preheat it to medium-high heat. The goal is to create a direct flame for roasting the chiles.
Roast the Chiles
Place the chiles directly on the chile roaster’s grates or on the grill grates. Make sure they’re evenly spaced, so they cook uniformly. Roast the chiles for about 5-10 minutes, or until the skin begins to blister and blacken.
Turn the Chiles
Using your tongs, carefully flip the chiles to roast the other side. Continue roasting for an additional 5-10 minutes, until the chiles are evenly blistered and the skin is charred.
Steam the Chiles
After roasting, place the hot chiles in a plastic or paper bag. Seal the bag to trap the steam. The steam helps loosen the skin, making it easier to peel.
Peel and De-seed
Once the chiles have cooled for about 15-20 minutes, remove them from the bag. Using your fingers or a dull knife, peel off the charred skin. Cut off the tops and make a lengthwise slit to remove the seeds and membranes, which can be quite spicy.
Enjoy or Preserve
Roasted chiles are incredibly versatile. You can enjoy them immediately as a side dish, in salsas, or as a topping for your favorite dishes. If you have an abundance of roasted chiles, consider preserving them by freezing or canning. This allows you to savor the flavors of chiles throughout the year.
Tips for Success:
- Always wear gloves when handling hot chiles to prevent skin irritation.
- Adjust the roasting time based on the thickness and spiciness of the chiles. Thicker chiles may require more time.
- Experiment with different chile varieties to discover unique flavors and heat levels.
- Roasting outdoors helps prevent your kitchen from becoming too smoky.
- Store roasted chiles in an airtight container in the refrigerator for up to a week.
Recipes for using roasted chiles
There are many delicious recipes that use roasted chiles.
Chile roasters are a great way to roast chiles at home. They are easy to use, efficient, and produce evenly roasted chiles. If you love to cook with chiles, a chile roaster is a must-have kitchen gadget.